Tuesday, September 22, 2009
Tuesday, May 19, 2009
Refinement 6
Scale 1:1 Model. Taped together, just to see the scale and impact it has in real life. I found from here, that I wanted the arms of the chair to be parallel, instead of following the angle of the side of the chair. Perhaps the room outside of the arms could be used to place drinks and small dishes. The final seat size is 40cm deep and 46cm wide.
Refinement 5
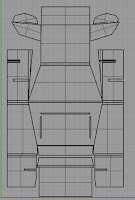
I built my final design in CAD - Rhinoceros. It helped me figure out how much extra material I will need for making all of the joints operate correctly. The CAD model also allowed me to see exactly how much angle is necessary for each slope. And I was able to figure out how to hide all of the joints well.
Sunday, May 10, 2009
Refinement 4
The fourth model was aimed to getting the locks to operate properly, and to finalize the sizes. There is a problem with it though, the arm rests are just 10mm wide, which, cannot really rest any arms, and the angle at which the seat tapers should be a bit larger. But it seems sturdy, and looks great. Refinement 5 will solve these two problems and then I will figure out how the joints will operate with the Xanita boards 10mm thickness.
Refinement 3
Refinement number 3 was geared to solving the problems of support. The backrest on chairs take a surprisingly large amount of load, so they have to be well supported. Along with the backrest, the seat itself needed some more support, so I essentially created an X underneath it will be able to support the necessary weight. For the backrest, I created a lock for the piece of the backrest that goes underneath, and then I added a lock on the armrests to add additional support for when it is under load.
Refinement 2
From my first model, I drew a pattern that included arm rests, and began to seriously think about how to reinforce the seat as it was not supported very well. I am pretty happy with where this idea is going because it is using almost the entire sheet of Xanita.
When you are taking place in a conversation, facing your mate is essential, so as a conversation chair, this is one of the aspects I want to integrate with my design. In this refinement I had the seat taper off to the front (where the legs are) to create an angle that, when the chairs are aligned next to each other allows you to see the person next to you more easily.
Refinement 1
So after discussing my three initial concepts with Justin, I have decided to push my idea for chair built to facilitate conversation. I like the idea of having people share their experiences while taking a rest form walking around the event. I had done research on such chairs, and sketched ideas to help me begin scale models. I had a hard time figuring out sizes so that the chair could be cut out by only one sheet of 1830x1220mm Xanita. I began with this first refinement and it did not have arm rests or the proper sizes. It was essentially built as a jump-off and from this model I added and solved problems that came up.
Tuesday, April 21, 2009
Sunday, April 12, 2009
Tuesday, April 7, 2009
Tuesday, March 31, 2009
Tuesday, March 24, 2009
Saturday, March 21, 2009
Monday, March 16, 2009
Origami
Friday, March 13, 2009
Origami Findings
Just some resources that I hope people find helpful!
cubes -
http://www.monkeysee.com/play/7872-paper-cube-making-origami
http://www.youtube.com/watch?v=3ccXDAu75HY - awesome
http://www.mathematische-basteleien.de/oricube.htm
-the same blow up cube, but step by step format, with the math at the end.
pyramids -
http://www.wonderhowto.com/how-to/video/how-to-origami-a-pyramid-254002/view/
http://www.wonderhowto.com/how-to/video/how-to-origami-a-diamond-pyramid-165961/
http://www.origamimauro.it/index.asp?modelli=8&tradizionali=25&valore=1&percorso=diagrammi/tradizionali/piramide
Sphere -
http://www.expertvillage.com/video/125845_origami-decorative-sphere.htm
http://www.wonderhowto.com/how-to/video/how-to-origami-a-fourteen-point-star-271720/
unrelated to the project for this week, but it shows how interlocking pieces and form interesting objects.
Tuesday, March 10, 2009
Saturday, March 7, 2009
Philippe Starck
Philippe Starck works as a product designer and interior designer who’s focus is on mass production. His furniture is very organic and fun to look at, though at times it does not function as well as it appears. He works mostly with polycarbonate for its ability to be manufactured, including cost, speed, and finishes. So unlike a good amount of other famous designers who mostly make pieces for certain situations, Starck works the corner of the market that is seen the most, costs the least, and is more available to the public.
Subscribe to:
Posts (Atom)